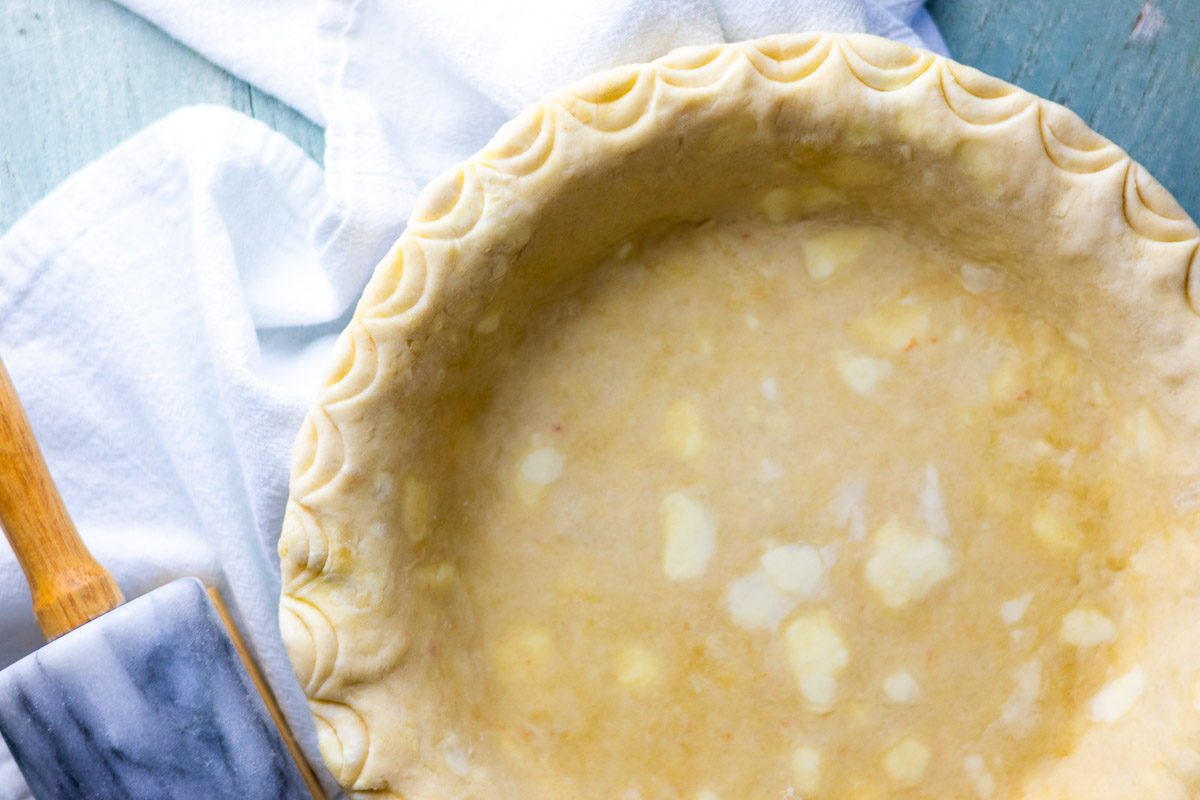
This classic lard and butter pie crust recipe delivers the flakiness lard is famous for, combined with the rich flavor of butter - a perfect blend for both savory and sweet pies.
I’ve included food processor instructions, making it easier than ever for beginners!
For generations, lard was the go-to fat for baking in American kitchens. It wasn't until some savvy marketing campaigns encouraged people to swap their lard for shortening in baked goods.
Thankfully, lard has been slowly rediscovered as a superior fat for baking, while all-butter pie crusts have made a major comeback (probably because they taste so good!). I like to get the best of both worlds by combining lard and butter in this old-fashioned pie crust.
And lard isn’t the only traditional fat I love to bake with — my tallow and butter pie crust recipe is another favorite!
Jump to:
Why Use Lard in Pie Crust
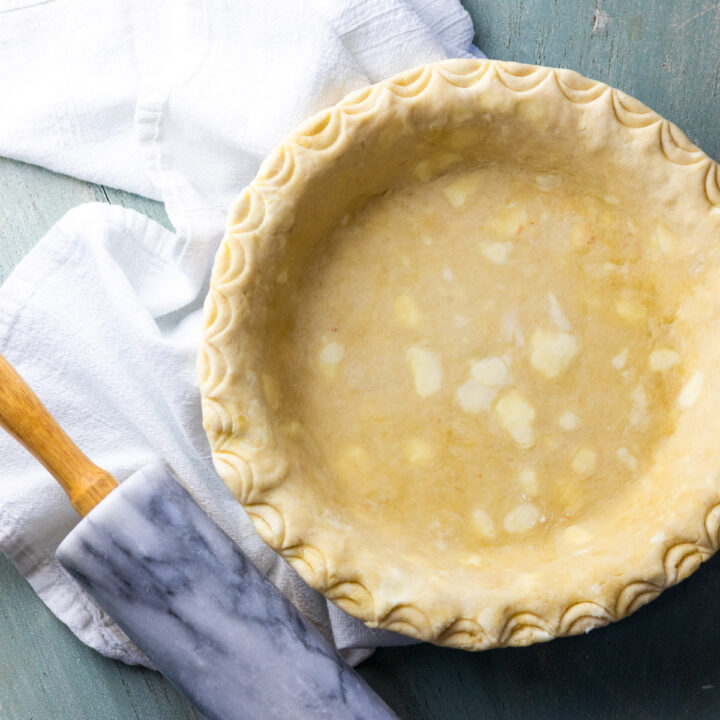
- Lard is 100% fat: Since it does not contain water, less pie crust shrinkage as compared to an all-butter crust.
- Flakiness: It helps create a deliciously tender, layered crust!
- Easy to work with: Since lard does not have water, it will stay firmer longer than butter, giving you slightly more work time.
Choosing the Right Lard
The best lard to use in baked pastries is leaf lard, which is fat that came from around the pig's kidneys. It is pure white, and nearly odorless and flavorless- perfect for flaky pie crusts without adding a porky flavor.
When shopping for lard for baking, look for:
- Leaf lard - Soft, white, and nearly flavorless. If is specifically says it is great for baking, even better. You do not want bacon grease or back fat lard - these both have a porky flavor.
- Pure Fat - No added flavors, hydrogenated oils, or artificial ingredients.
- No or minimal preservatives – Citric acid is a common preservative that can add a sour note to your crust.
- Freshness – The very best leaf lard is either home-rendered or locally rendered, fresh from a trusted source. Home-rendered leaf lard is even better!
Ingredients
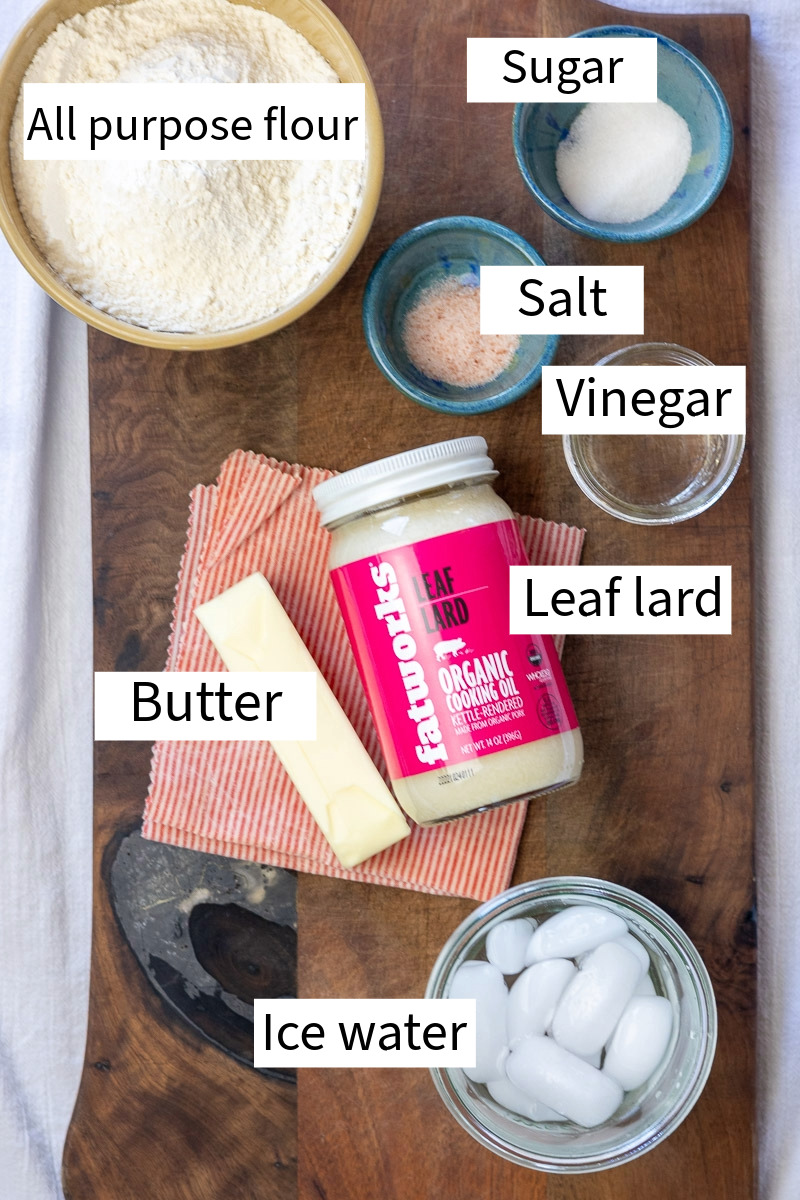
- All Purpose Flour
- Butter (COLD) - preferably unsalted. Cut in cubes.
- Leaf lard (COLD) - Cut in chunks/cubes. Read above for guides on the best kind to get. My go-to for quality is the one by Fatworks. Get it on Amazon or their website.
- Salt
- Sugar - Optional, but I like to use it in both sweet and savory pies.
- Ice water - This is used to bind all ingredients together. You only want just enough for everything to come together.
- Vinegar (optional) - I usually just use distilled white vinegar, but you can also use any kind, or even vodka. 1 tablespoon added will help prevent gluten formation and oxidation.
Find the complete recipe with measurements below.
Equipment
You can make a pie crust with as little equipment as a bowl and your hands, but I like to use a food processor from time to time. If you’re a beginner, I recommend trying it too — it takes some of the guesswork out.
Don’t have one a food processor? No problem. You can also use a pastry cutter, two knives, or simply your hands to cut the fat into the flour. (Although those are a tad more advanced techniques for the beginner.)
- Food Processor
- Large mixing bowl and fork
- Saran wrap or beeswax wraps
- Food scale (optional)- Weighing in grams may be faster and more accurate.
- Pastry mat (optional)- Nice to have but not necessary.
Instructions
Remember to make sure your butter and lard are well chilled and cubed before beginning. It doesn't hurt to also chill your flour and other ingredients.
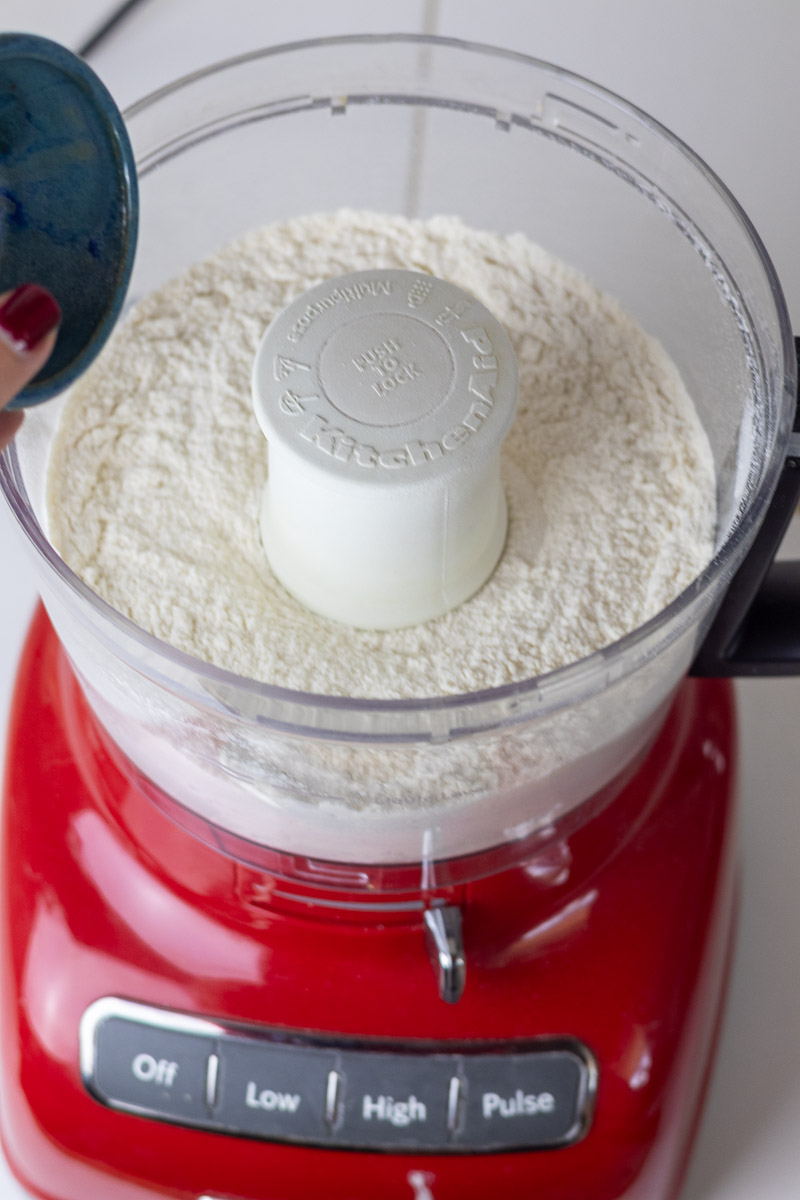
Step 1: Combine flour, salt, and sugar to the food processor. Blend on low to incorporate.
Step 2: Add your lard chunks, and process for around 30 seconds until you see smallish pebbles, the size of peas.
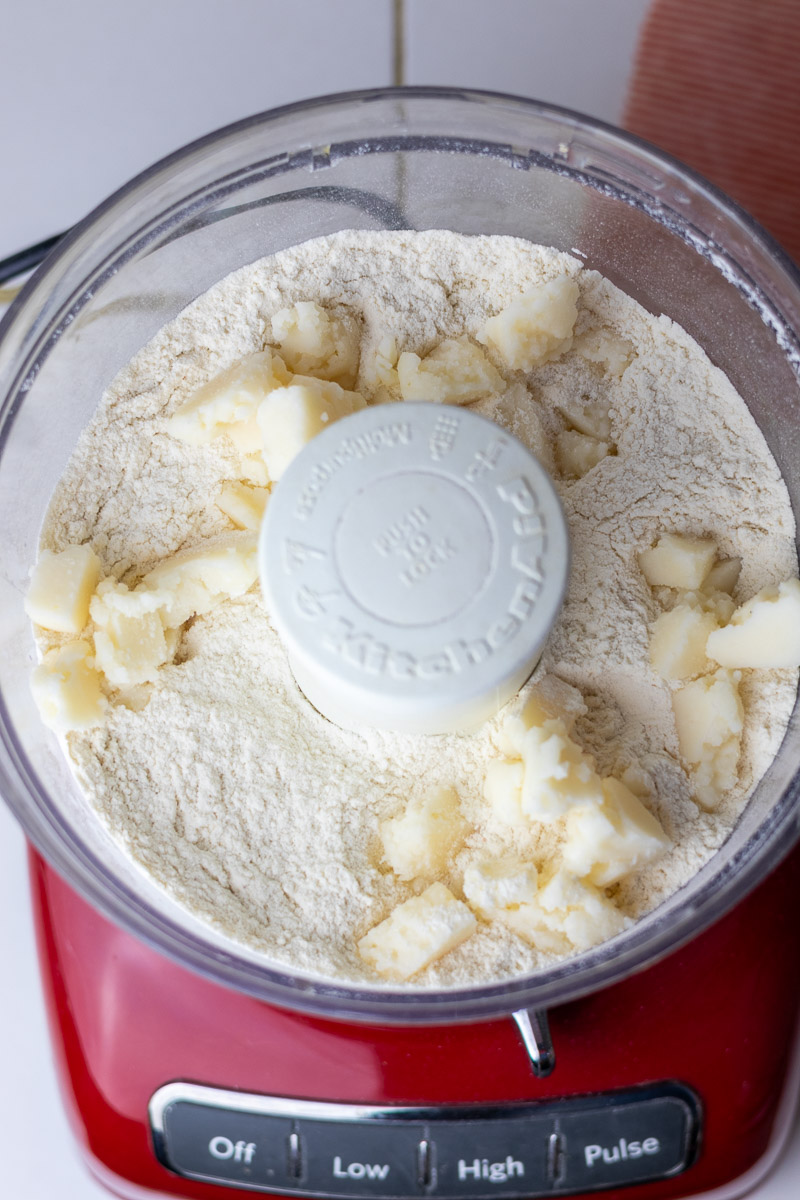
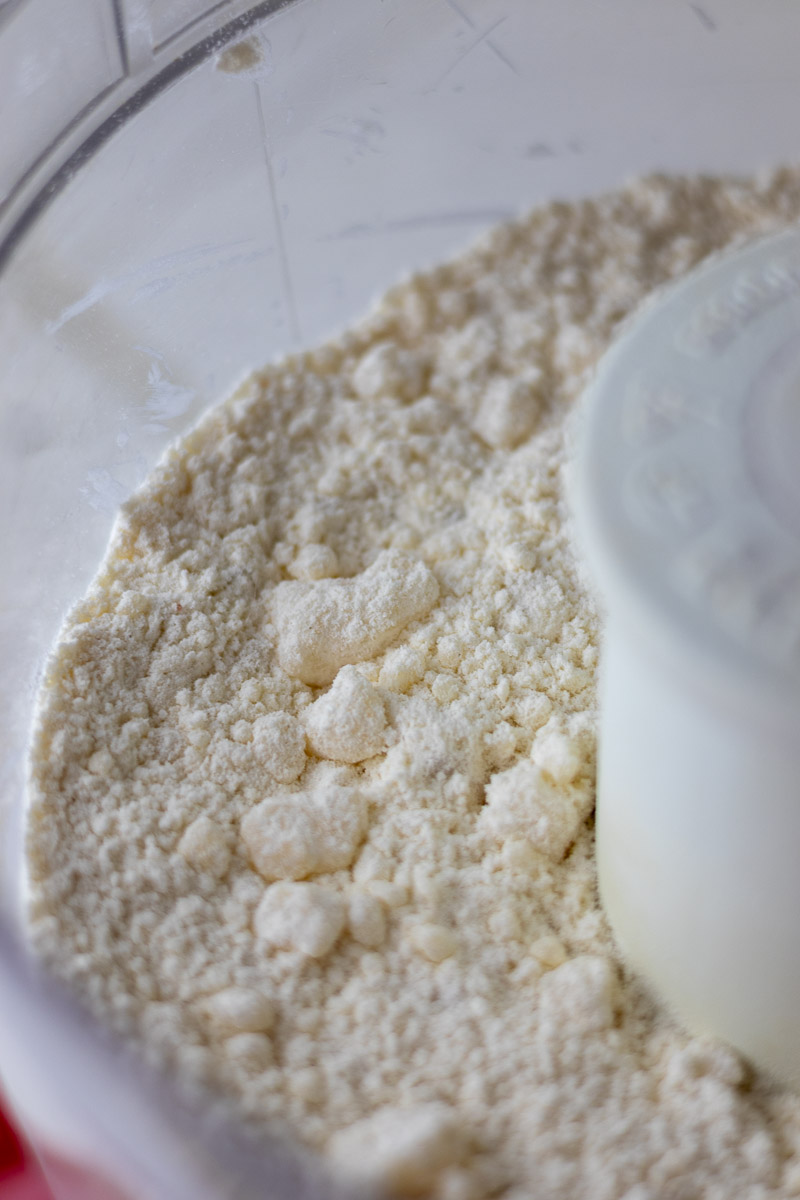
Step 3: Add your butter cubes and pulse 5-10 times.
To prevent over processing, you will finish everything in the mixing bowl.
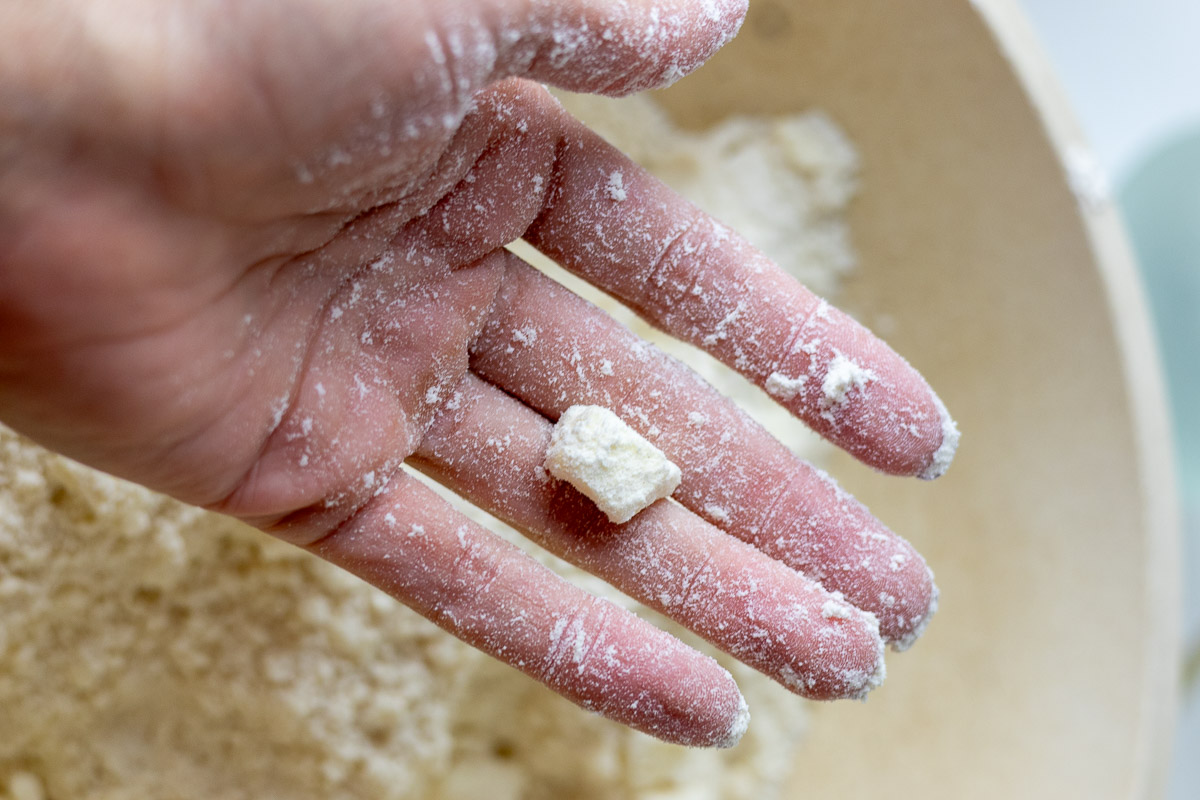
If you feel anything larger than an almond, squish between your fingers to make smaller. It doesn't have to be perfect.


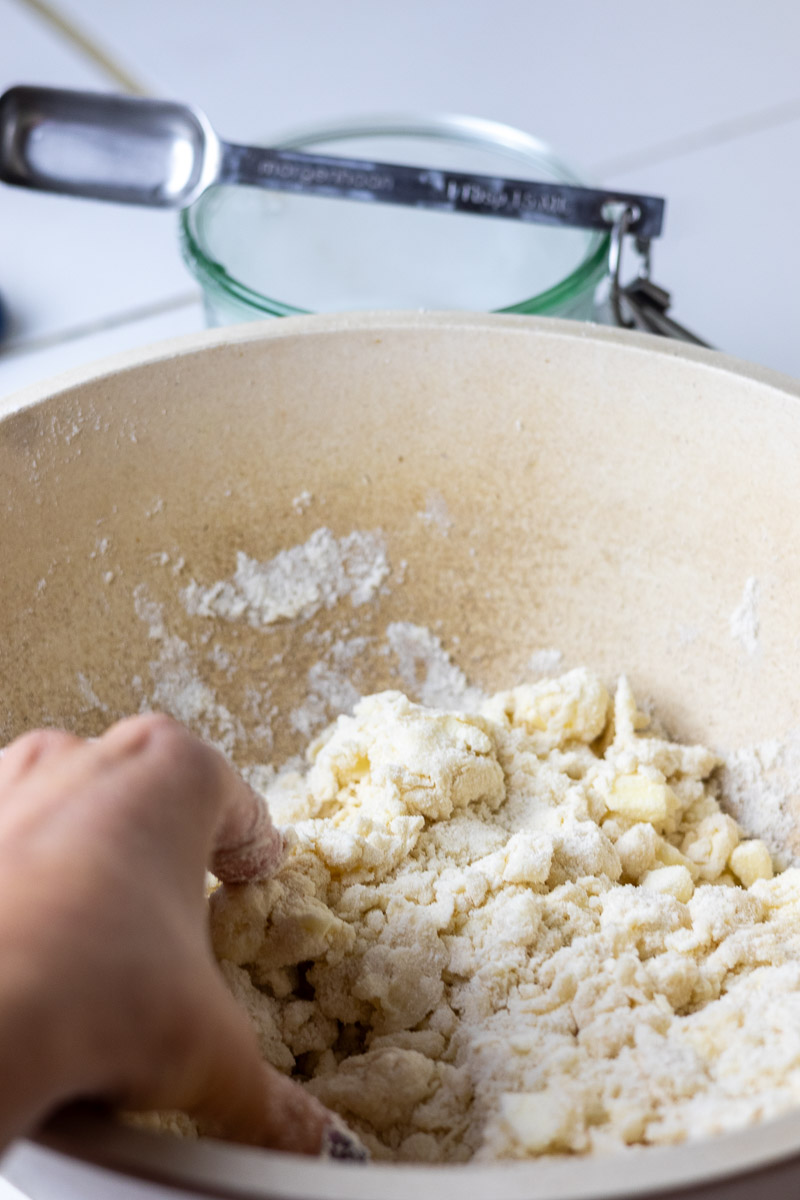
Step 4: Add your cold vinegar, and using your hands or fork, blend.
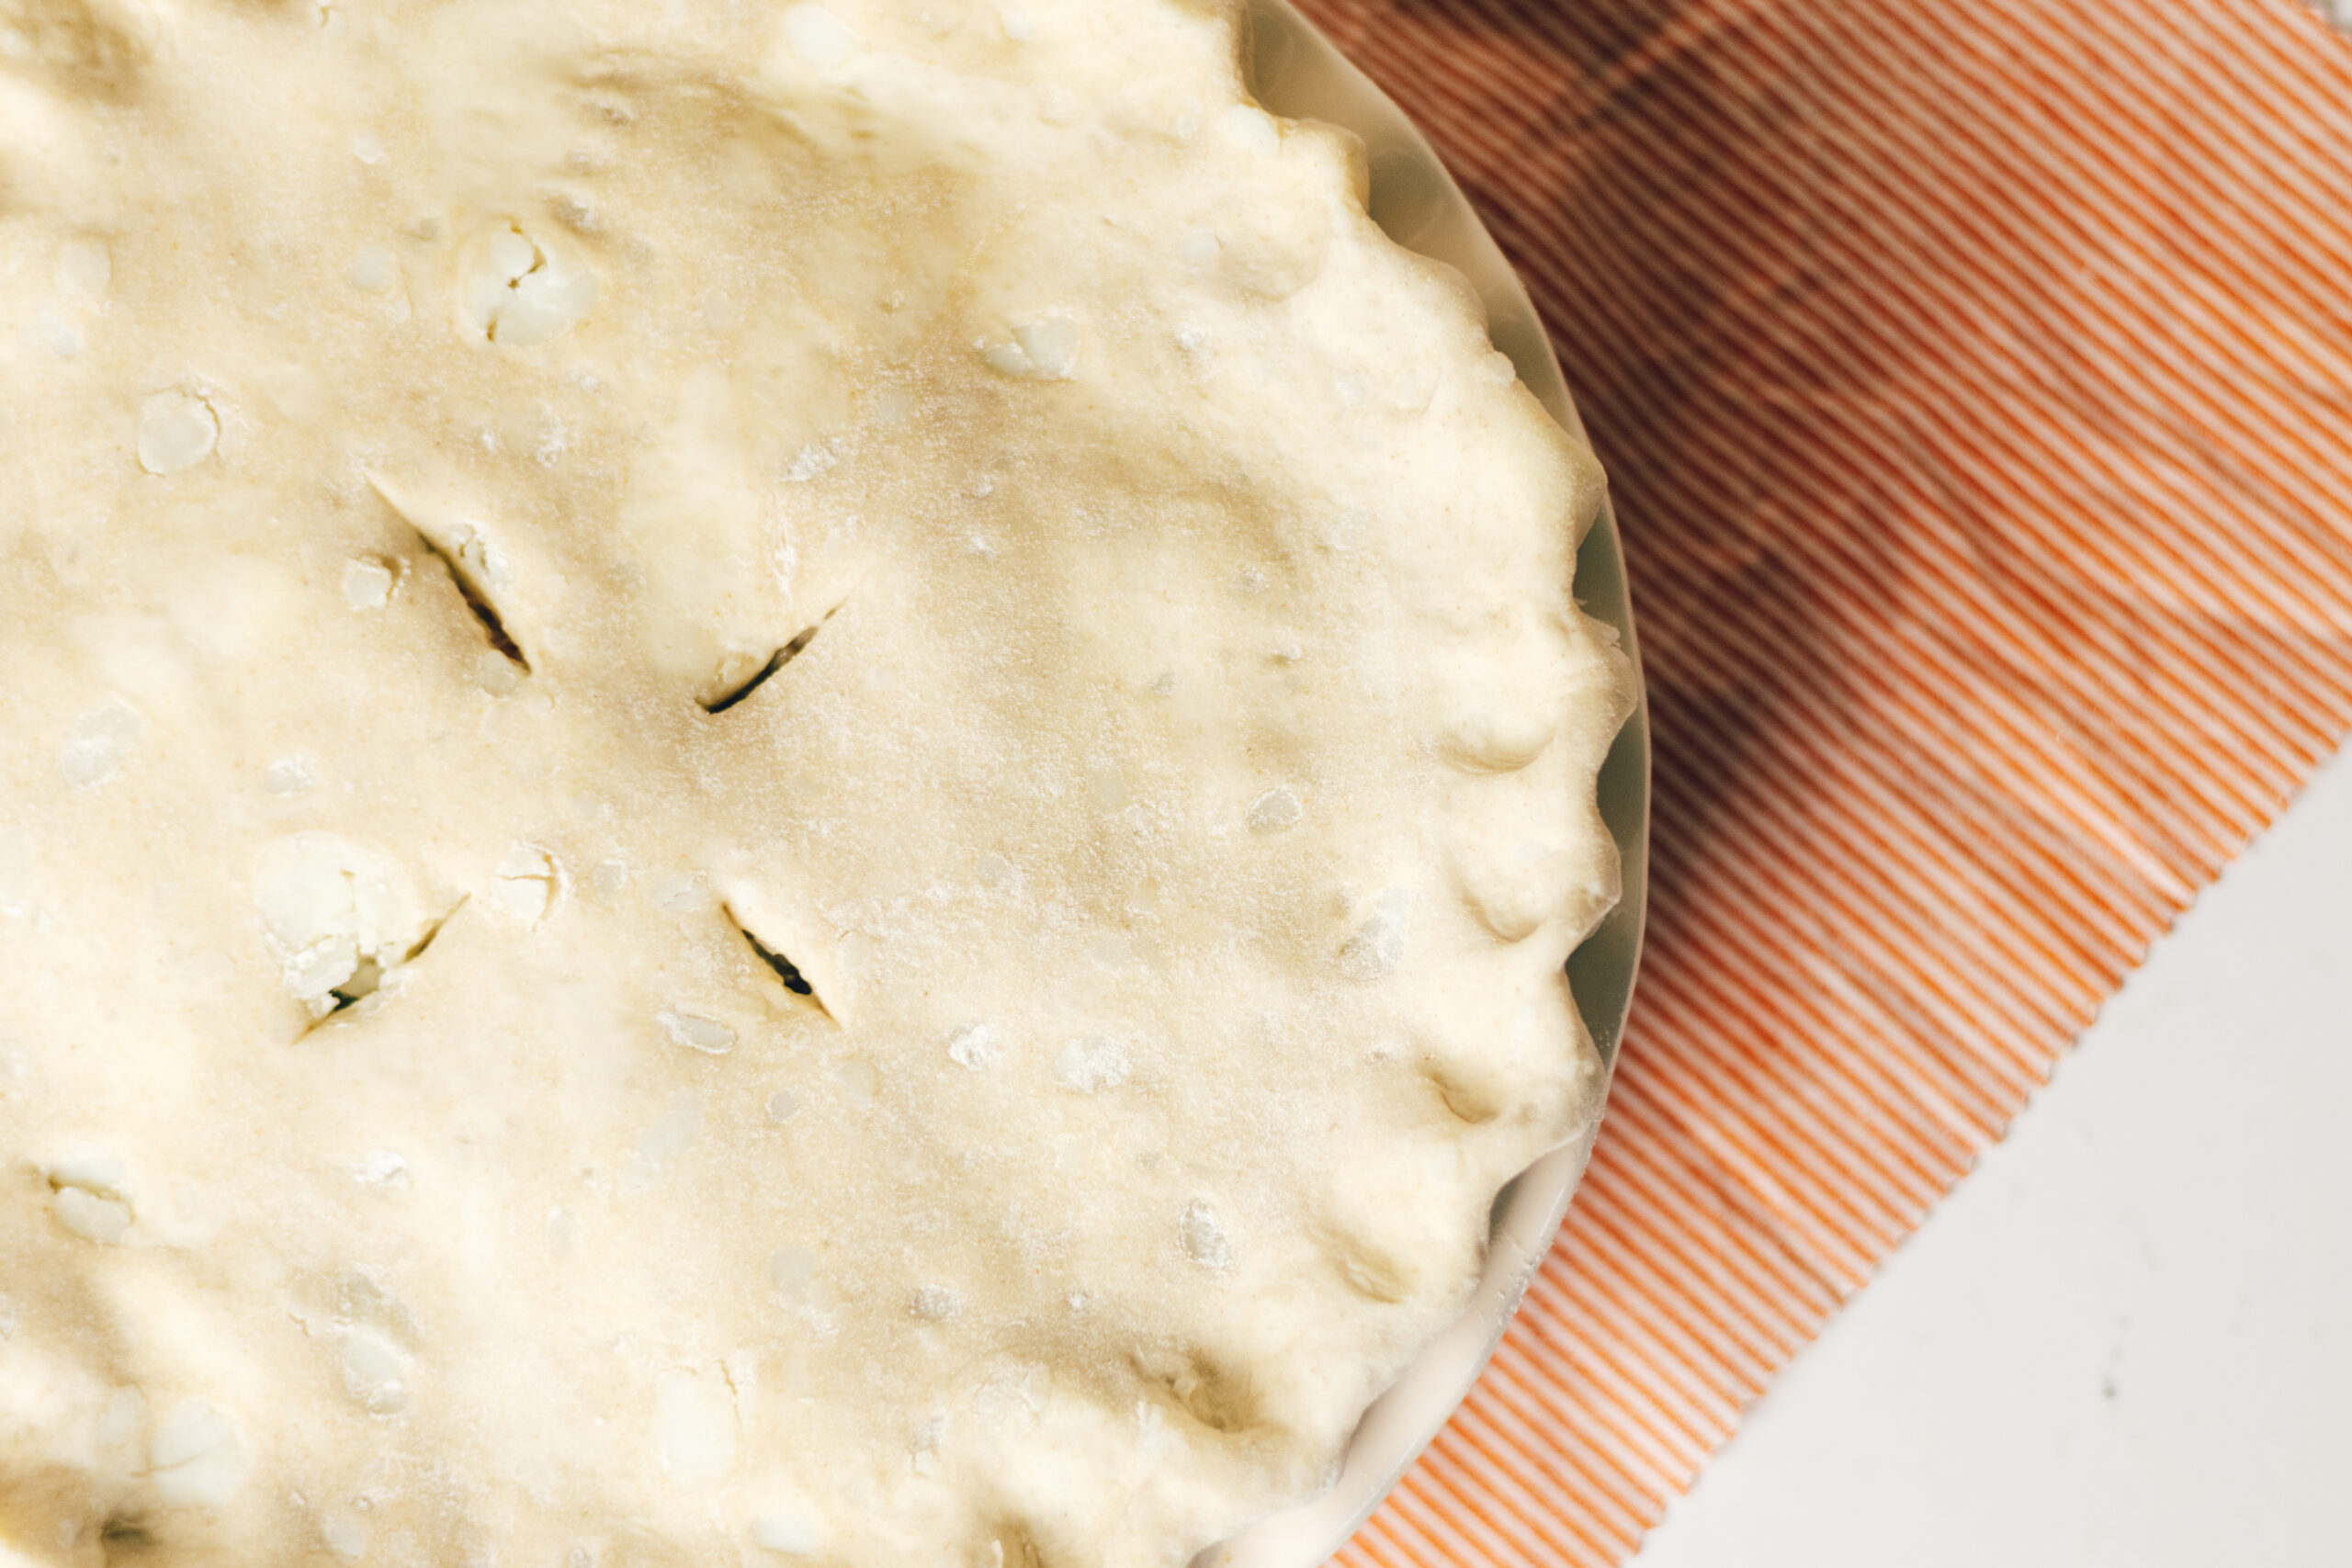
Step 5: Next add your ice water 1 tablespoon at a time until everything comes together with the least amount of water. Create 1 large disk.
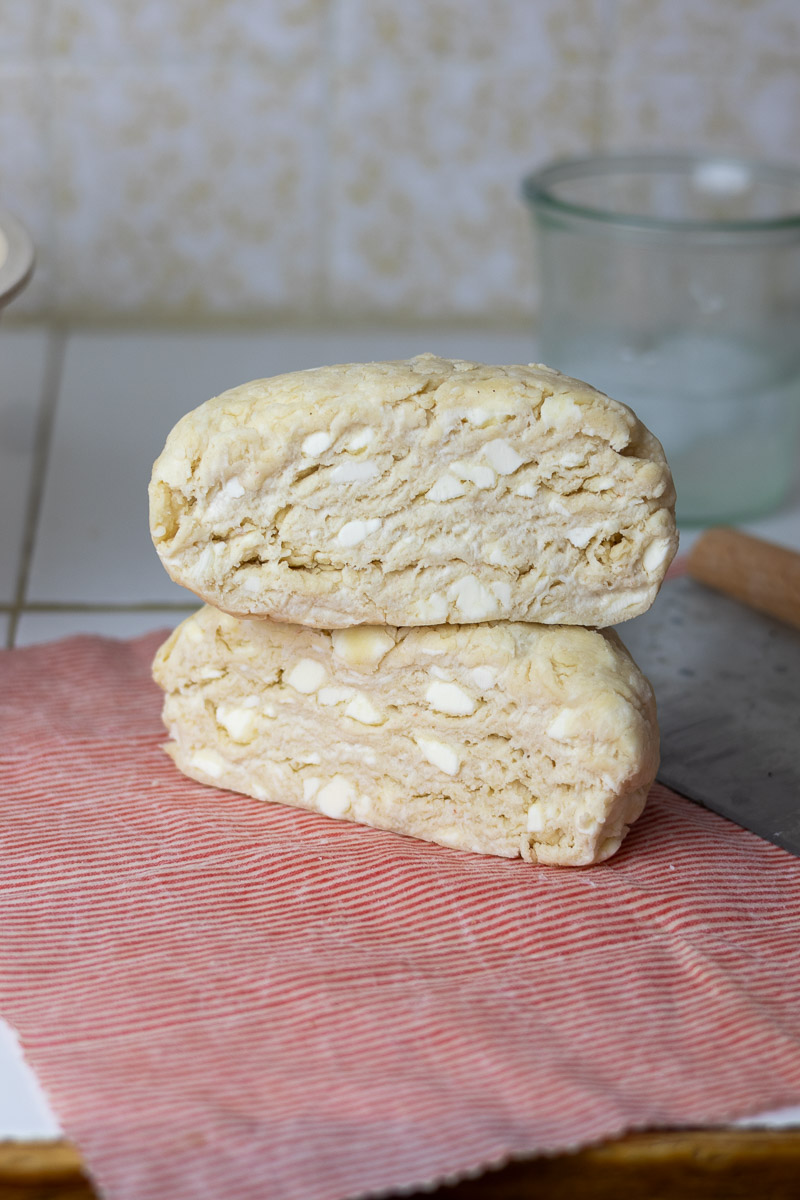
Step 6: Cut in half and form 2 disks.

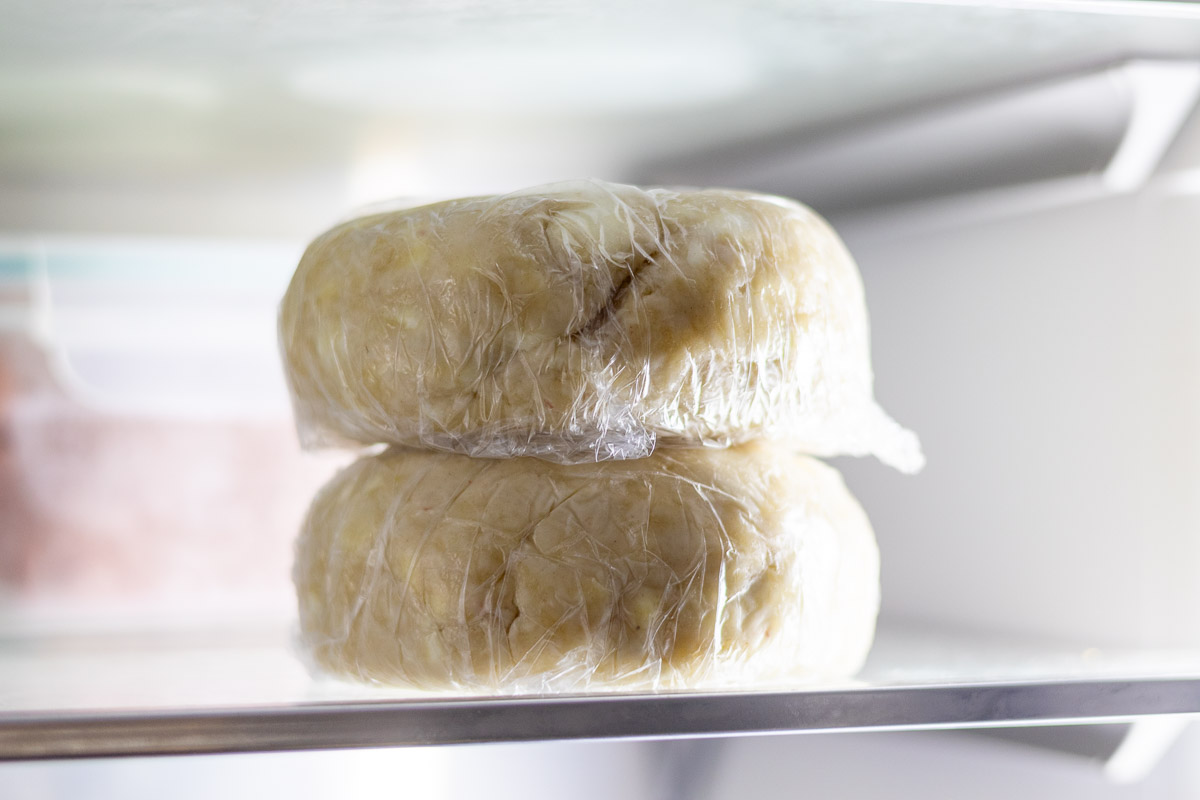
Step 7: Wrap in plastic wrap or beeswax wraps and bring to refrigerator to chill for at least an hour before rolling out. Preferably overnight.
Bakers Tips
- I do a 50/50 leaf lard and butter blend for this pie, but the ratios are flexible. Feel free to experiment if you would like.
- If you find everything is getting a little warm, just pop it all back in the refrigerator to give yourself some more work time.
Top Tip
Keep everything COLD! I actually like to put all equipment in the refrigerator along with the ingredients. It really makes a difference in giving you more work time and a flaky crust.
Storage
Wrap tightly with plastic wrap or beeswax wraps and place in the refrigerator. Use within 24 hours or freeze for up to 3 months, thawing overnight before using.
FAQ
No, as long as you use leaf lard that has been properly rendered, the crust will not have a noticeable pork flavor.
Yes! I have a post that walks you through making a tallow and butter pie crust.
Related
Looking for other recipes like this? Try these:


Old-Fashioned Lard & Butter Pie Crust
This classic lard and butter pie crust recipe delivers the flakiness lard is famous for, combined with the rich flavor of butter, a perfect blend for both savory and sweet pies!
Ingredients
- 3 cups all-purpose flour (360 g)
- ½ cup cold leaf lard (100 g), chilled and cut into small pieces
- ½ cup unsalted butter (1 stick) (113 g), chilled and cubed
- 1 teaspoon salt
- 1 tablespoon granulated sugar (optional)
- 1 tablespoon vinegar (optional)
- ¼ cup ice water + you will likely need much more.
Instructions
- Combine flour, salt, and sugar to the food processor. Blend on low to incorporate.
- Add your lard chunks, and process for around 30 seconds until you see smallish pebbles, the size of peas.
- Add butter cubes and pulse 5-10 times. To prevent over processing, you will finish everything in the mixing bowl. If you feel anything larger than an almond, squish between your fingers to make smaller. It doesn't have to be perfect.
- Add your cold vinegar, and using your hands or fork, blend.
- Next add your ice water 1 tablespoon at a time until everything comes together with the least amount of water. Create 1 large disk.
- Cut in half.
- Wrap in plastic wrap or beeswax wraps and bring to refrigerator to chill for at least an hour before rolling out. Preferably overnight.
- Use within 24 hours or freeze for up to 3 months, thawing overnight before using.
Did you make this recipe? I’d love to hear how it turned out for you!
If you enjoyed it, please consider leaving a 5-star rating and a comment below — it really helps support my blog.
Notes
- Keep everything COLD! I actually like to put all equipment in the refrigerator along with the ingredients. It really makes a difference in giving you more work time and a flaky crust.
- I do a 50/50 leaf lard and butter blend for this pie, but the ratios are flexible. Feel free to experiment if you would like.
- If you find everything is getting a little warm, just pop it all back in the refrigerator to give yourself some more work time.
Recommended Products
As an Amazon Associate and member of other affiliate programs, I earn from qualifying purchases.
-
 KitchenAid 13-cup Die-Cast Metal Food Processor (Renewed)
 -
Fatworks, Pasture Raised Leaf Lard, a.k.a. "Baker's Lard", Artisanally Rendered, for Traditional & Gourmet Baking, Sauteeing, Frying, WHOLE30 APPROVED, KETO, PALEO,14 oz.
-
Amazon Basics Digital Kitchen Scale with LCD Display, Batteries Included, Weighs up to 11 pounds, Black and Stainless Steel
-
Bee's Wrap Beeswax Wraps for Food - Honeycomb 3 Pack (S, M, L) Made in USA Reusable & Organic Food Wraps, Sandwich Wrap & Bowl Covers - Eco-Friendly Alternative to Aluminum Foil & Plastic Wrap
-
Silicone Baking Mat, Non Stick Pastry Mat Sheet for Dough Rolling, Nonslip Fondant/Pie Crust Mat, Counter Mat Oven Liner Mat for Making Cookies Macarons Bread Baking Supplies Extra Large 26 x 16 Inch


Comments
No Comments