Tallow is a great traditional fat to keep on hand in the kitchen. In this guide, I’ll show you how to dry render tallow into a firm, flavorful fat that’s perfect for frying, roasting, savory baking, and more—all in a single day.
Traditional fats like tallow and lard are easier to find than they once were, but they can still be expensive. Rendering your own at home takes some effort, but it’s cheap, sustainable, and a practical skill you’ll be glad you learned.
The method I’m showing you in this post is the most straightforward and works well for many everyday uses. I reach for my dry rendered tallow most often when cooking or frying, but it can also be used for soap making or other projects if scent is not a concern (I’ve noticed that the scent of the fat/oils doesn’t transfer much to finished soap).
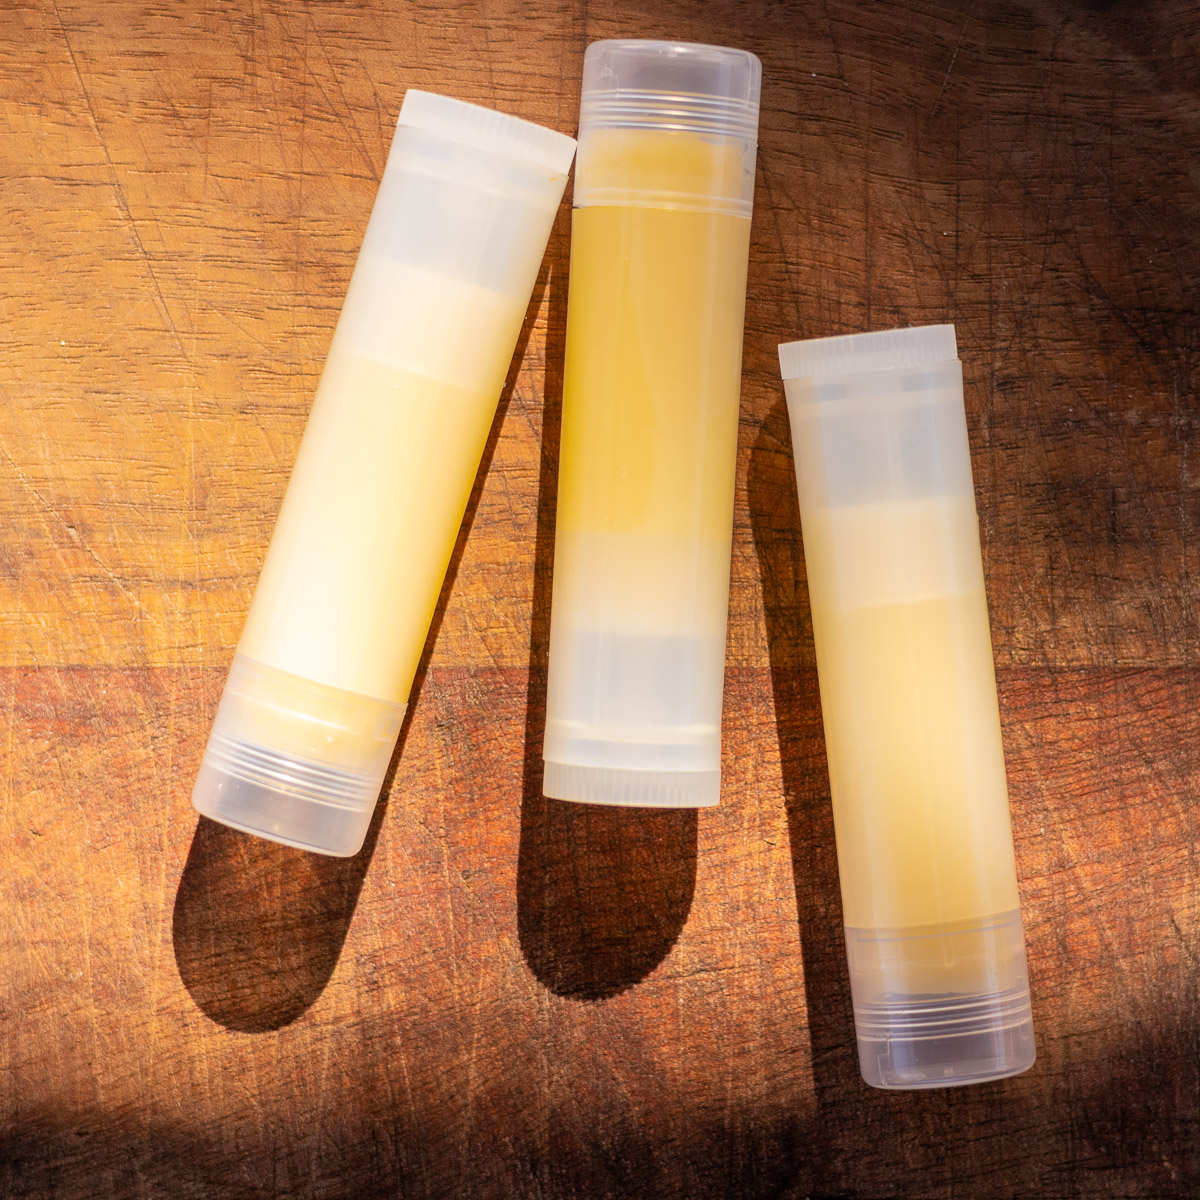
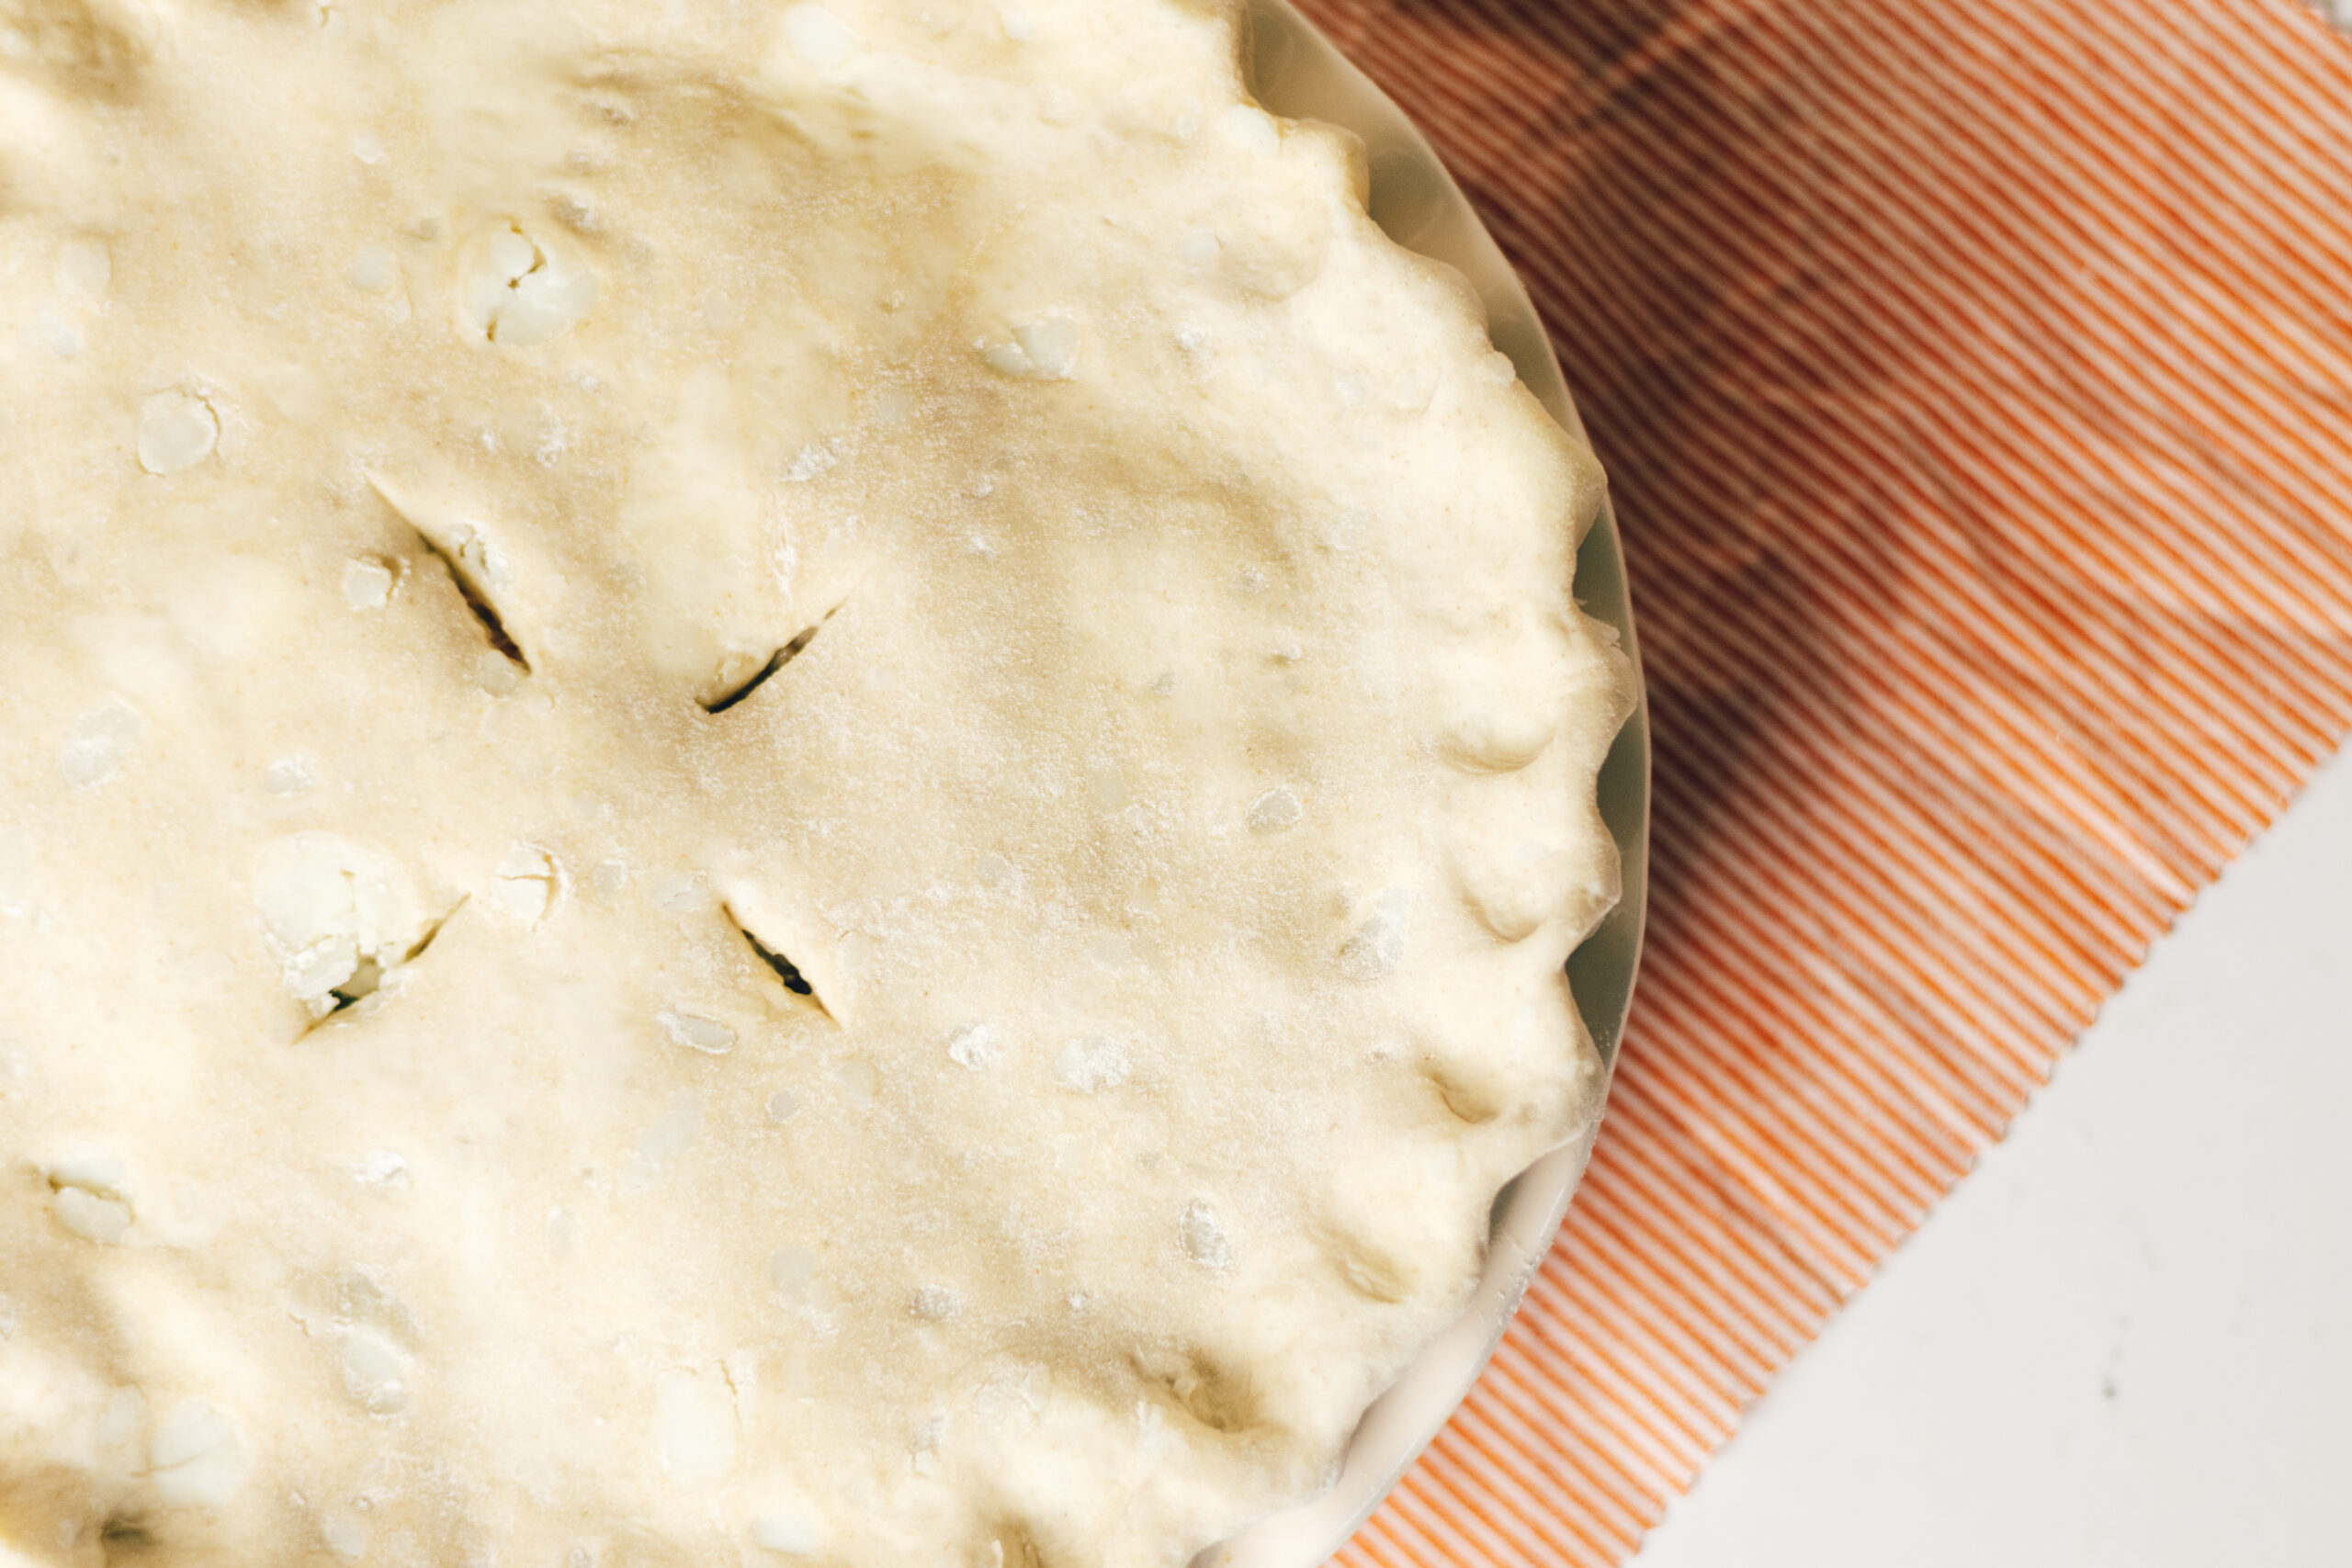
I still love using the wet rendered tallow method for things like tallow lip balm and my tallow pie crust, since the end result has very little odor, though this method does take more time and effort.
New to tallow? Check out my other post for an introduction on tallow and tips on how to use it.
Jump to:
What is Dry Rendering?
Dry rendering tallow is a method where suet is gently heated to release the pure fat from the remaining solids such as connective tissue, membrane, and other meaty bits. Because you are heating fat directly, it is important to keep the temperature low and steady so the solids do not burn and impart that flavor to the tallow.
Dry rendering is the most straightforward way to make tallow, as opposed to the wet render method, which requires water and much more care to remove all the water.
A crockpot is my preferred way to dry render tallow, but many people also use the oven set to a very low temperature. Stove top is not recommended because there is too much direct heat on the pot, and therefore more likely to burn.
Where do I Find Suet?
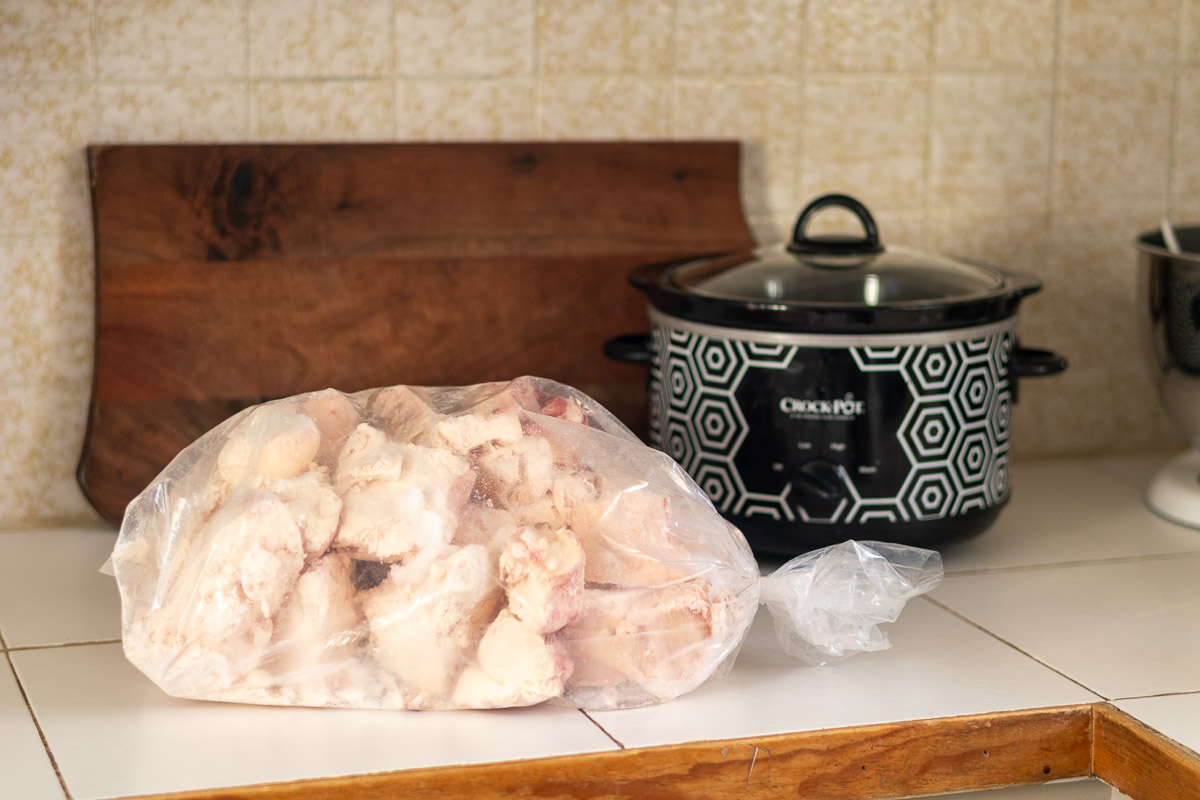
Suet is the firm fat surrounding a cow’s kidneys and is usually available from most butchers. I like to buy it in bulk—10-pound bags are perfect—and keep it in the freezer until I’m ready to render. Chopping partially frozen suet is much easier.
Make sure you ask for kidney suet specifically, since some shops might offer general fat trimmings instead. If your butcher can grind it for you, that’s even better: it makes the rendering process faster and eliminates the need for an immersion blender.
Ingredients and Tools
Batch size note: I am using a 4.5 quart crockpot and can comfortably fit 4-5 lbs of unrendered suet. If you have a larger crockpot you can fit more.
Ingredients
- Suet - The hard fat found around the kidneys of ruminant animals. This is different from general fat trimmings. While this method can be done with fat trimmings, the finished tallow will be softer and have a stronger scent. Grass-fed is best.
Tools
- Crockpot - Keeps the heat during the rendering process slow and steady.
- Immersion blender - This is handy for blending the suet so it releases fat quicker.
- Ladle and stirring spoon- Used to scoop the hot rendered fat from crockpot and stir as the tallow is rendering.
- Fine mesh sieve - Catch the large solids.
- Cheesecloth - Catch even smaller particles for a clearer tallow.
- Paper towels - Tallow rendering is messy! Keep paper towels on hand to wipe as you go.
- Thermometer (optional) - Useful if you want to closely monitor the temperature, though I find it unnecessary if you stir often and keep the crockpot on low.
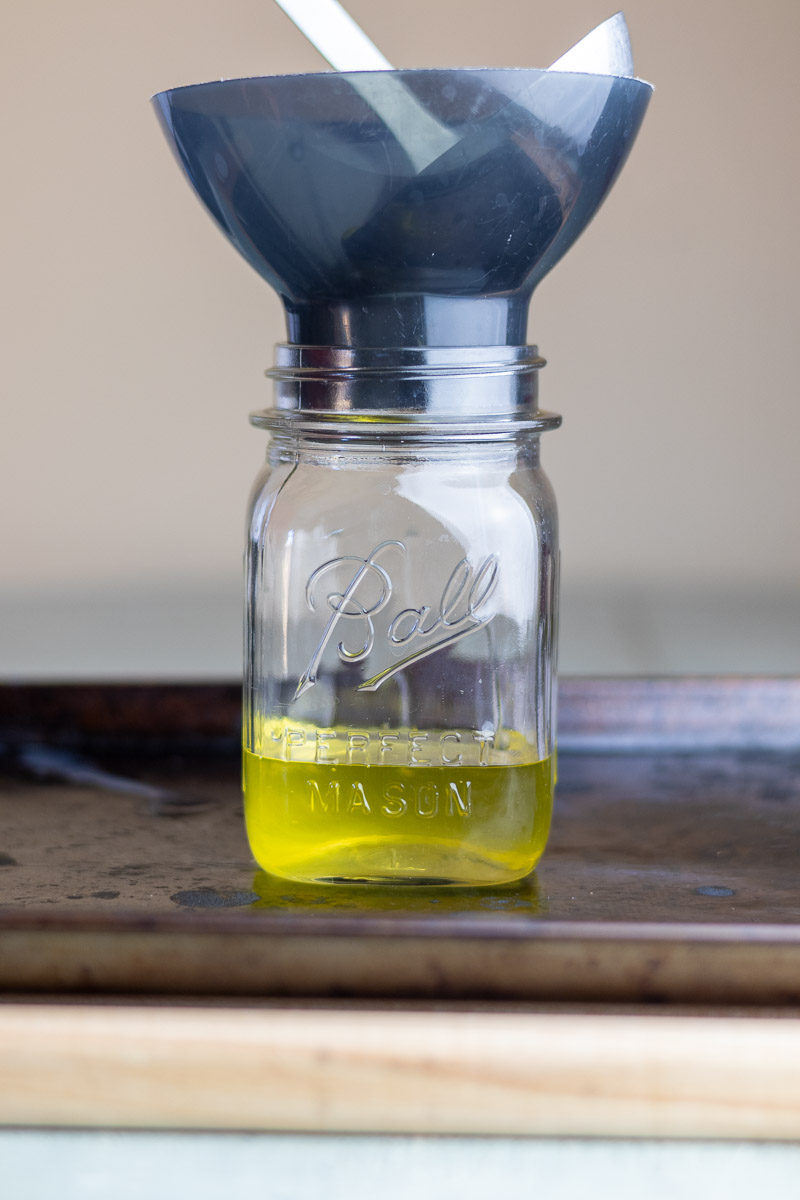
- Mason jars + lids, plastic molds, silicone molds - For storing the finished tallow once strained. Use any or all of these.
How to Dry Render Tallow: Step by Step
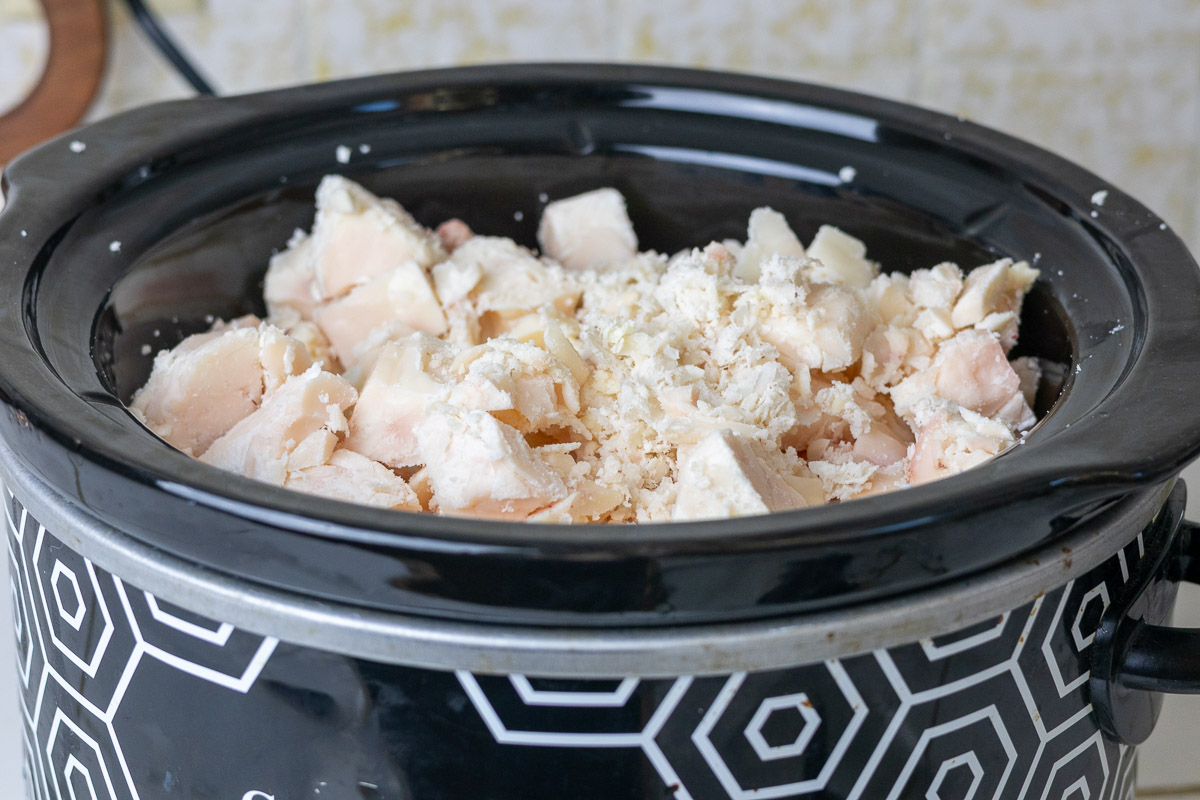
Step 1: Prepare the suet
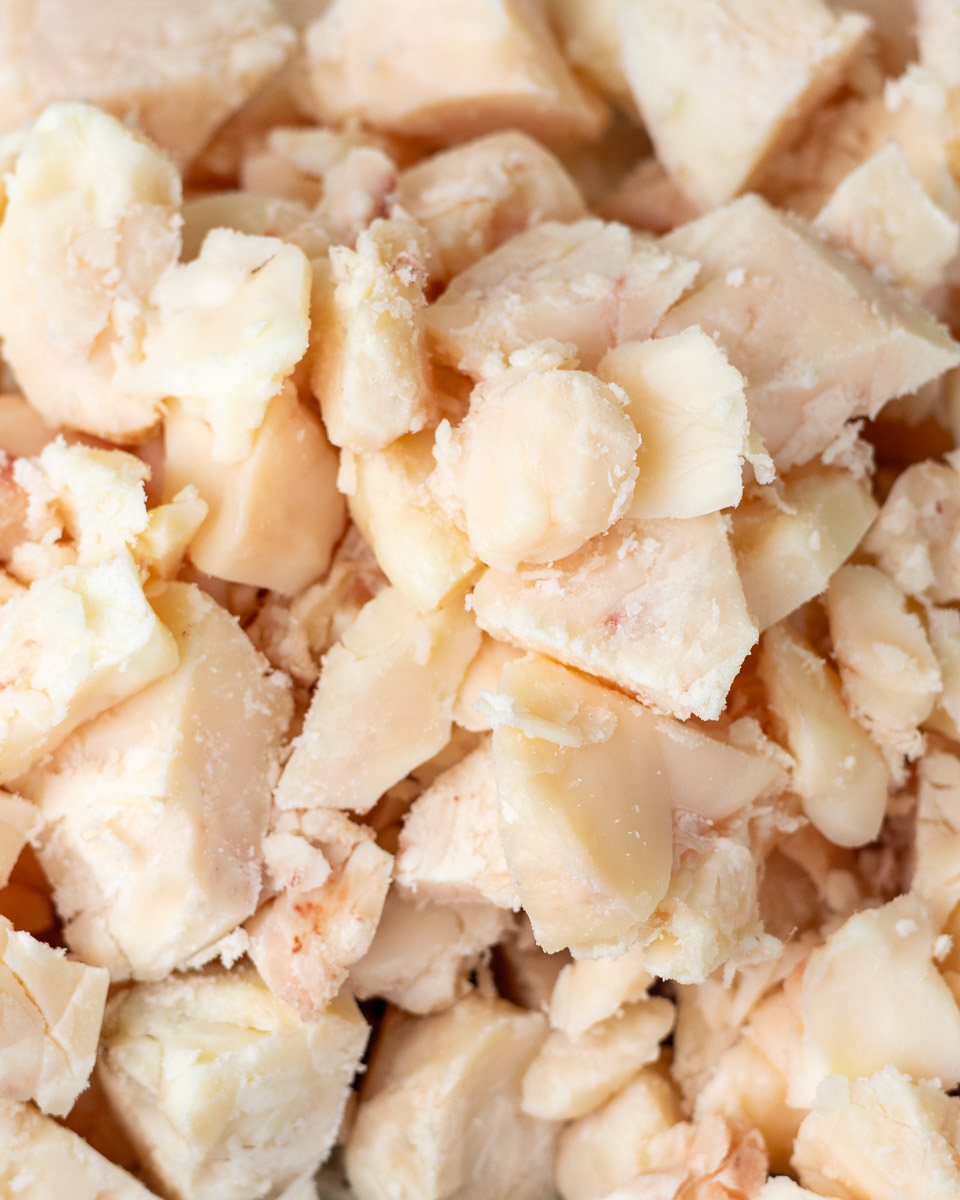
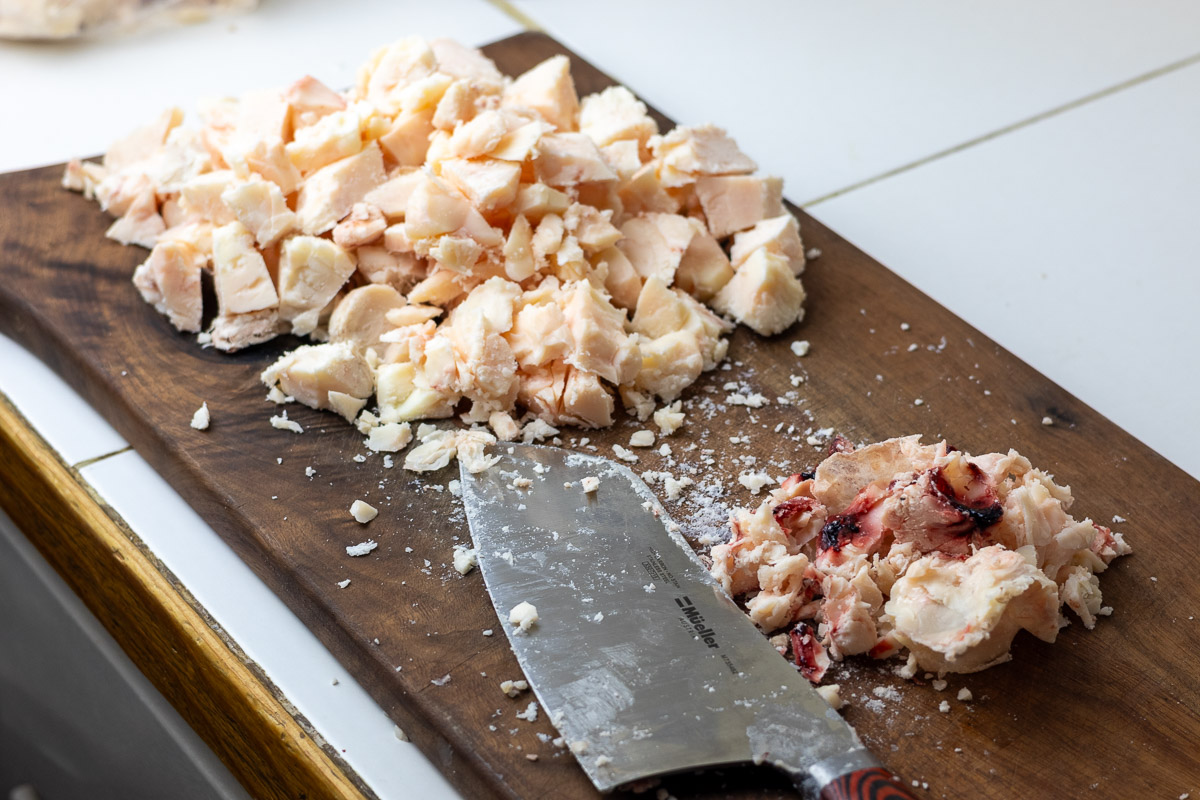
Chop the suet into small pieces, removing any membrane, meaty bits, or connective tissue as you go. This helps prevent them from wrapping around your immersion blender and reduces the beefy scent in your tallow.
Step 2: Start the rendering
Place the suet in the crockpot and turn it to LOW. Allow it to heat gently, uncovered, until the fat becomes very soft, about 2 hours.
Step 3: Blend the suet
Once softened, carefully use an immersion blender to create a smooth mixture. Take care, as the mixture will be hot.
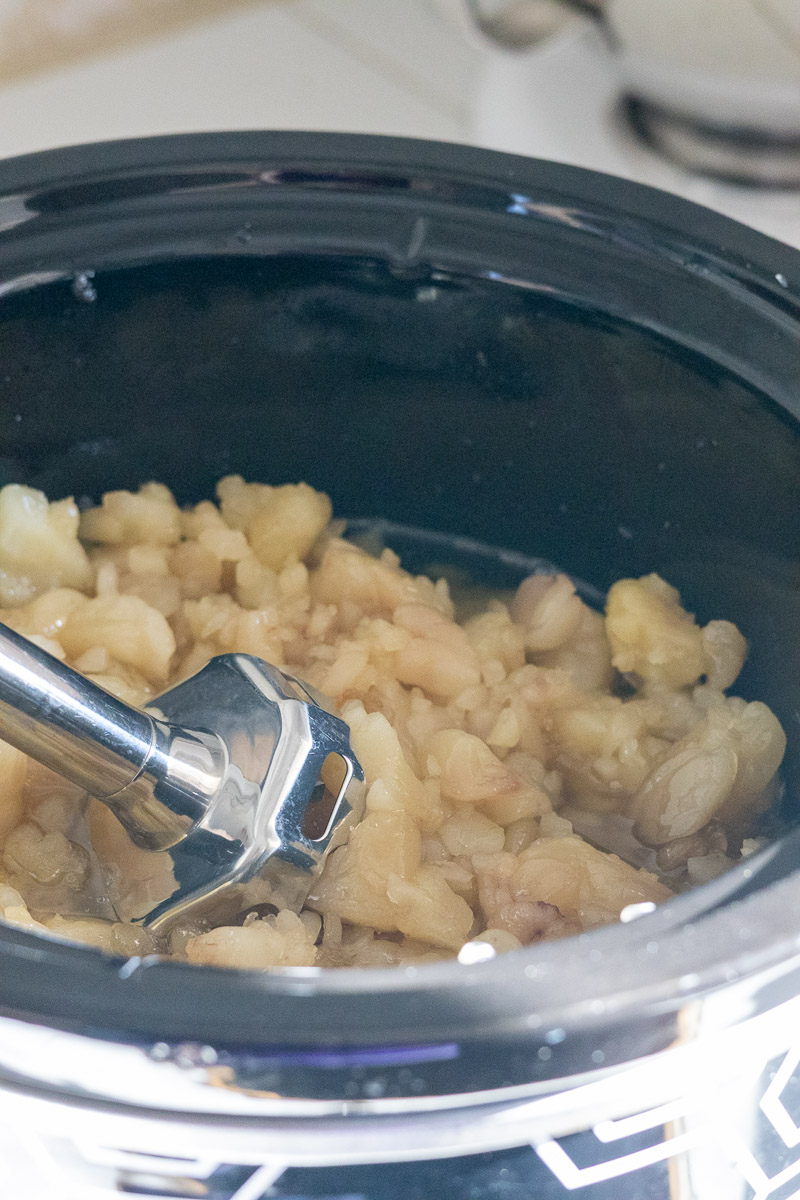
Step 4: Render low and slow
Continue cooking on LOW, stirring occasionally. If using a thermometer, keep the temperature below or around 200°F to prevent burning or excess flavor. If it goes over a bit over that's okay, just keep stirring to distribute heat.
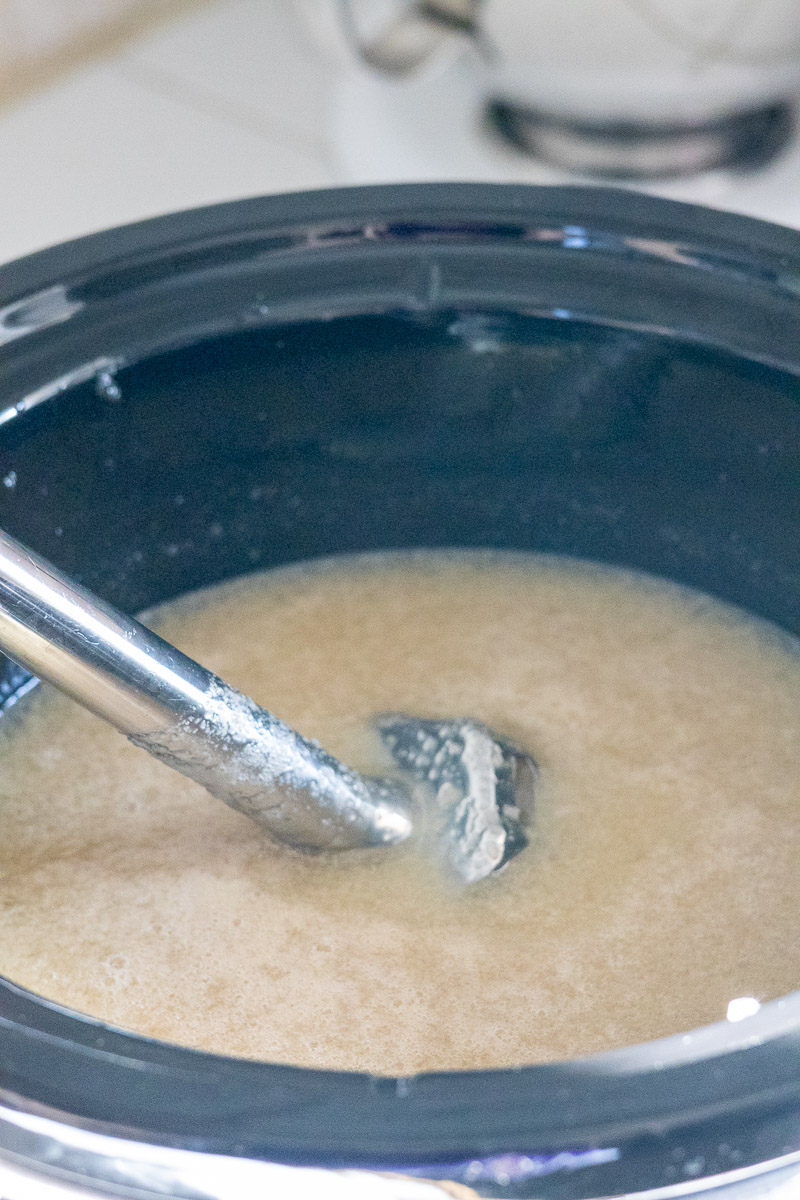
Step 5: Check for doneness
When the solids have fallen to the bottom and the fat looks clear, turn off the heat. Some of the solids may have darkened a bit- that is ok. The tallow is ready to strain.
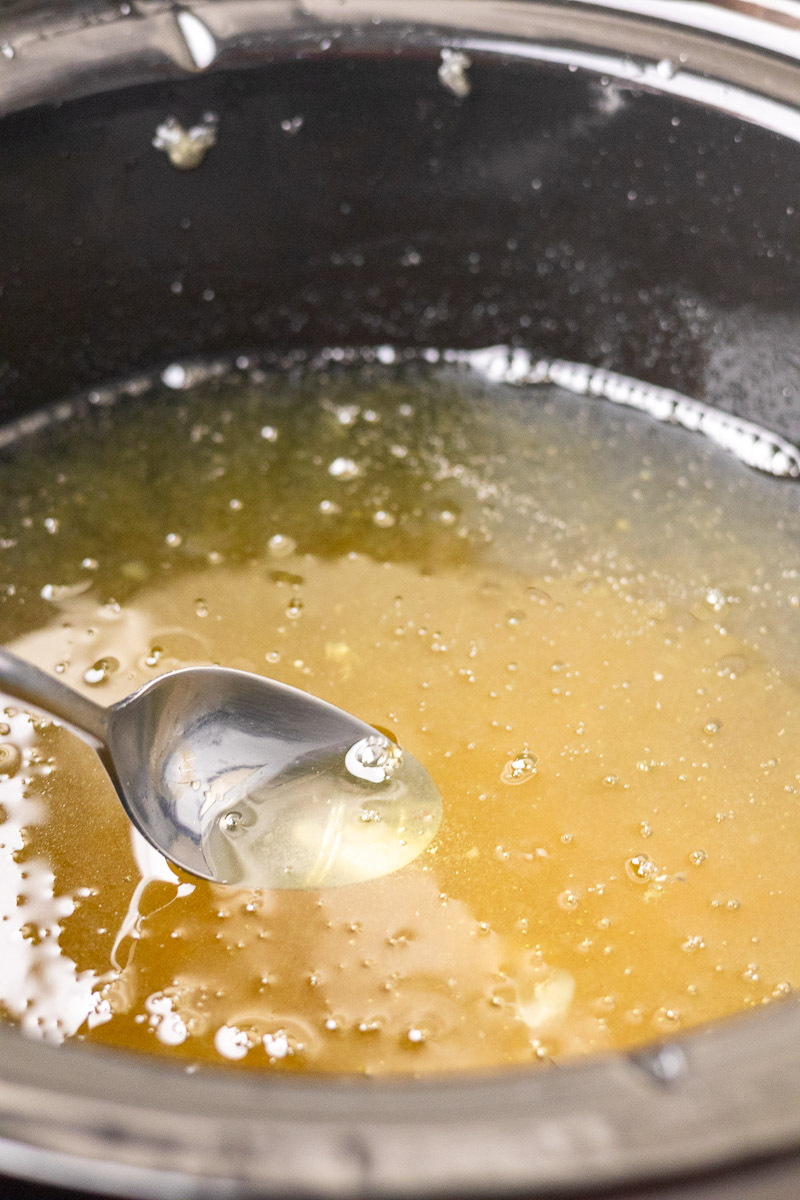
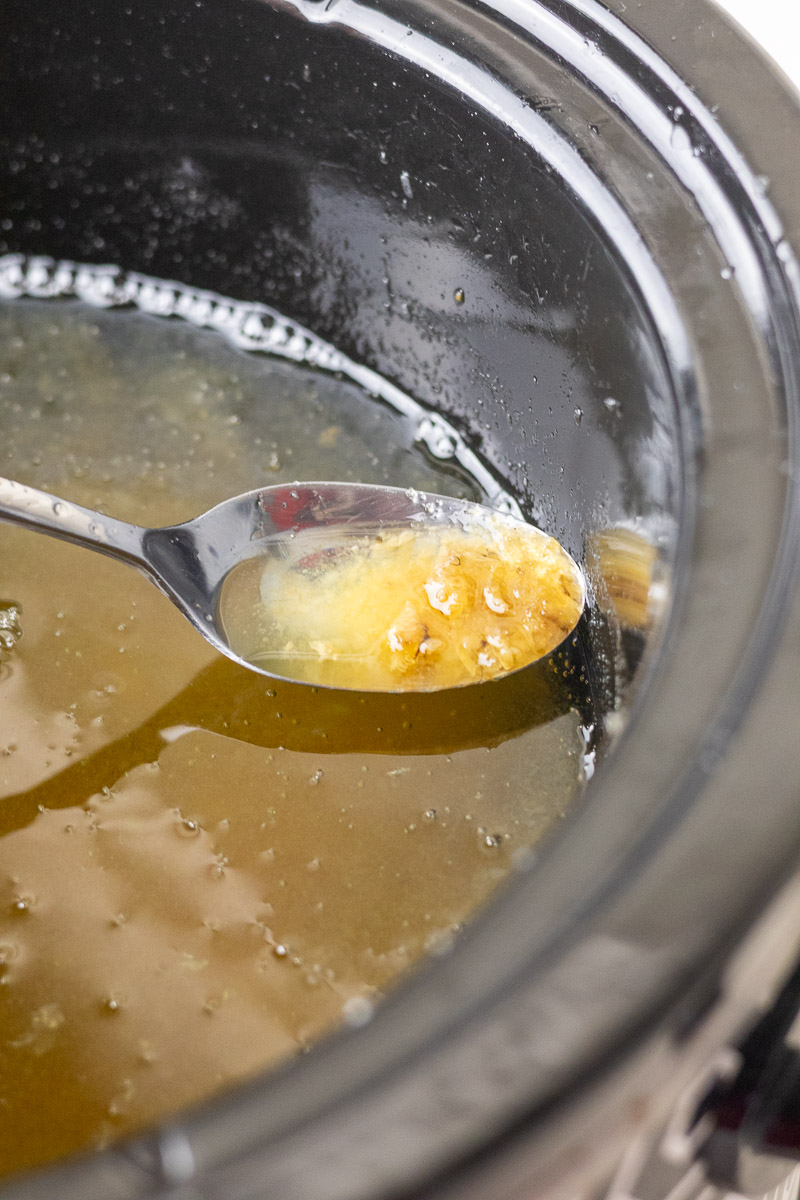
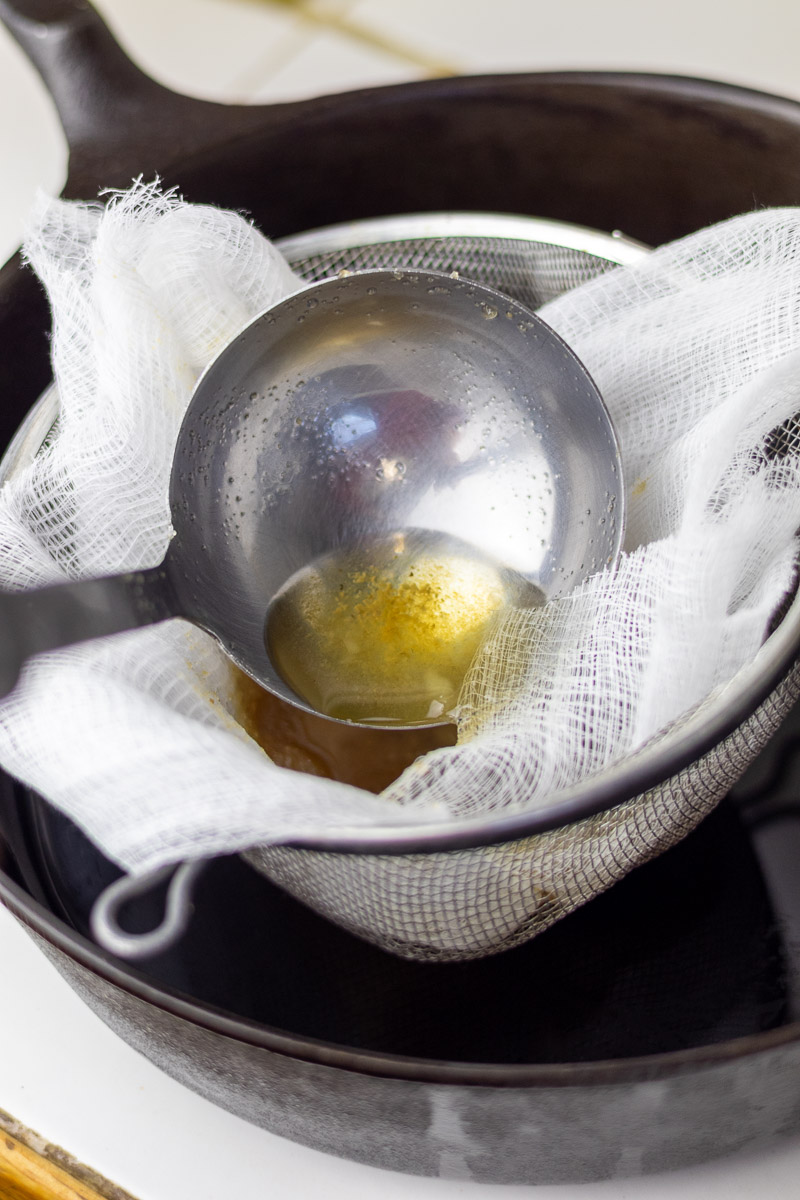
Step 6: Strain the tallow
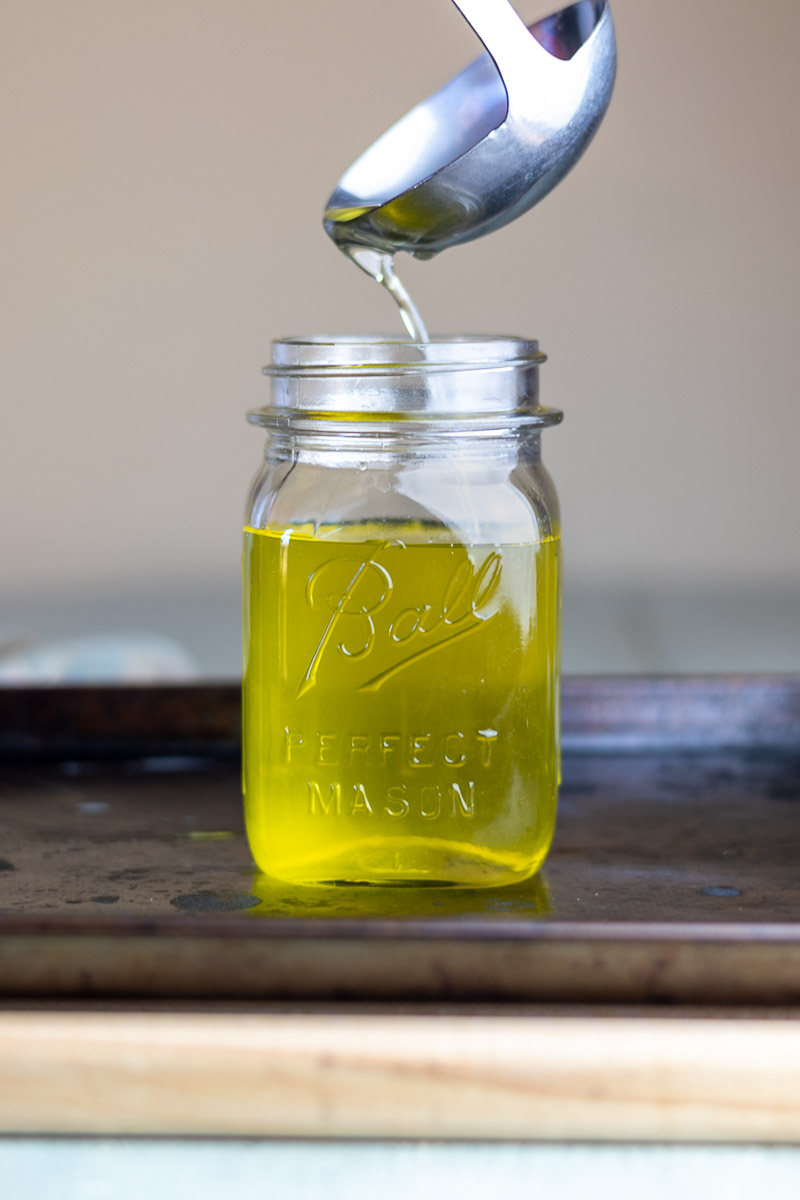
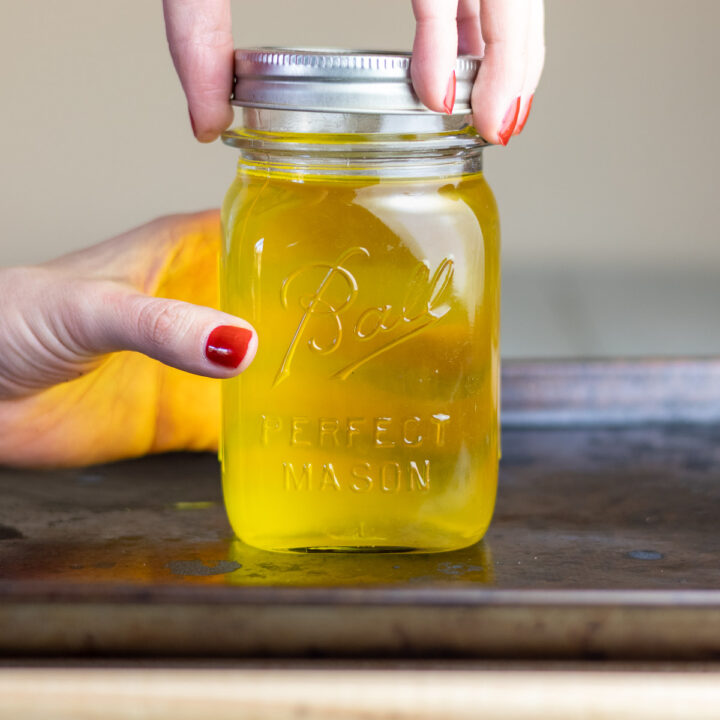
Set up a fine mesh strainer lined with cheesecloth over jars or a heat safe container. Ladle the hot tallow through the strainer, leaving the solids behind. I recommend starting with the clear tallow from the top of the crockpot and avoiding the solids at first. This is your “top shelf” tallow. Pour or ladle this portion through the strainer directly into hot, dry jars or heat safe molds while it is still hot.
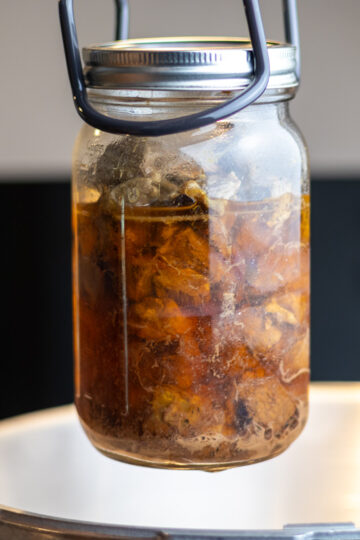
Once most of the clear fat has been strained, continue ladling the remaining tallow along with the solids. This portion will have a stronger scent, and some fine particles may pass through the strainer.
Storing Tallow
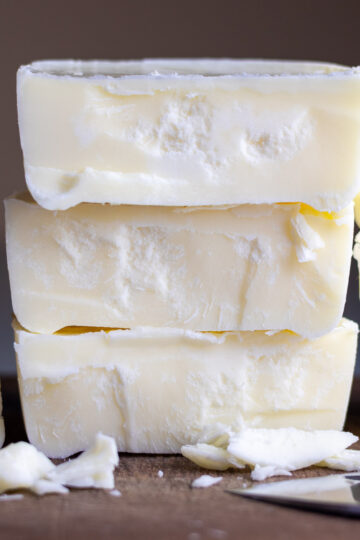
Jars or blocks of tallow will keep for several months when stored at room temperature and for years if frozen. I like to wrap tallow blocks tightly in plastic wrap, then freezer paper, and label them before freezing.
I also freeze most of my jars so I can be sure the tallow stays fresh and does not go rancid before I need to use it.
Tips
- Keep heat low and stir often to avoid burning. Avoid temptation to go on high!
- Start with the clear top layer for the cleanest flavor.
- Paper towels are your friend—tallow sets very hard when cool, so wipe crockpot, utensils and surfaces while everything is still warm.
How to Use
- Everyday cooking and frying - Sauté veggies, crisp home fries, or fry anything else- tallow has a very high smoke point.
- Savory baking - Create tender, flaky biscuits, savory pasties, or other homemade goodies.
- Cold process or hot process soap - Tallow is an amazing ingredient in soap! It helps create a hard, long-lasting bar. Any lingering tallow scent does not tend to end up in the finished soap, especially when adding fragrance.

FAQ
Dry rendering tallow is faster and simpler than wet rendering and works well for cooking and soap making. Wet rendering takes longer and requires careful removal of water to prevent spoilage, but it produces a very mild-smelling, high-quality tallow. Choosing the right rendering method depends on whether you prioritize speed or a neutral scent in your tallow.
On average, I get about 1 to 1¼ cups of tallow per pound of suet, which weighs around ½ to ⅔ pound.
Yes! It will work just as easily. Keep in mind that the natural scent will vary depending on the animal.
Yes. The finished product will be much softer than suet, but it will still be excellent for cooking and frying.
Yes! Use your “top-shelf” tallow—it will be the clearest and have the least amount of scent, making it the best choice for soaps, balms, and other body care products.
Related

How to Dry Render Tallow
Tallow is a great traditional fat to keep on hand in the kitchen. I’ll show you how to dry render tallow into a firm, flavorful fat that’s perfect for frying, roasting, savory baking, and more—all in a single day.
Materials
- Suet
Tools
- Crockpot
- Immersion blender
- Ladle & stirring spoon
- Fine mesh sieve + cheesecloth
- Paper towels
- Mason jars, silicone molds, or other containers
Instructions
- Prepare the suet – Chop into small pieces, removing membrane, meaty bits, and connective tissue to reduce beefy flavor and prevent blender clogs.
- Start rendering – Place suet in the crockpot on LOW. Heat gently until soft, about 2 hours.
- Break down the suet – Use an immersion blender carefully to create a smooth mixture.
- Render low and slow – Continue cooking on LOW, stirring occasionally. Keep temperature around 200°F. A slight overshoot is okay—just stir to distribute heat.
- Check for doneness – When solids fall to the bottom and fat looks clear, turn off the heat. Some darkening is fine.
- Strain the tallow – Use a fine mesh strainer lined with cheesecloth. Start with the clear top layer (“top-shelf” tallow) for the cleanest flavor, then strain the remaining fat with solids if desired.
- Store – Tallow keeps for months at room temperature or years in the freezer. Wrap blocks tightly or store in jars.
Notes
Recommended Products
As an Amazon Associate and member of other affiliate programs, I earn from qualifying purchases.


Comments
No Comments